Showing posts with label Make-Overs. Show all posts

Sunday, November 19, 2017

My Kitchen - The Old & The New - Make-over

It's been a while since my last post...although I have started a few balls rolling, I still don't have any definitive answers as to what I will end up doing...with my home.  You can read the post where I talked about Things Never Staying the Same HERE

Right now, though, I want to share some photos from 2 years ago...Christmas 2016 in my Kitchen, Sitting Room {dining room} and Exterior of my home.  Then I will show you lots of photos of the way it looks NOW, since the Make-Over!


Kitchen


Kitchen Island


Cabinet [one of 2] on either side of my Range 


Sitting Room at the end of the Kitchen
[used to be my dining room, see next photo]


Old Exterior of My Home

*     *     *     *     *     *     *

November 2017

This is how the outside of my Home looks now.


New doors to my Home - Welcome


My New Hearth Kitchen
New Backsplash and Burlap-y Curtain Fabric blocks the view into my glass-front cabinets and hides the clutter.


New Samsung Range & Micro-Hood


New French Door, Counter Depth Samsung Refrigerator 
and my oldie, but goodie GE Profile Dishwasher


All new Ceiling Fans and Light Fixtures
including the lovely chandelier above the island
and a glimpse into my new Sitting Room


Kitchen looking into Living Room
Dinette Set at the end of the Island works well


I Love, love, love my French Door Refrigerator
and it only extends a few inches past the cabinets to the right
compared to 8 1/2" that my old refrigerator stuck out!!

You'll see more of my sitting room next time.

Hope you enjoyed this tour.


Monday, October 23, 2017

My Home Office...Make-Over 2017

Before I show you my Office as it looks now, Fall 2017, I thought I'd share a photo and the link to my post about my Office...


See all the Pink?  The "pretties" and lace curtains...even some French items?

Believe me, when I say I changed my style, look and color palette this time around.  I even put the cabinet doors on my cabinets in my re-do.  And there is no more Massage Table.  You probably won't recognize the room!! 

Here is my New Office - Guest Bedroom 


This is looking in through the French Doors, which now have a Elderberry pattern window film added for privacy.  It was very easy to apply.  The most difficult thing about the application was making all the individual cuts for each window...10 per door.  I even added it to the window on the wall directly across from the doors, as the window looks out to the neighbor's lawn that grows a foot high before they cut it and the porch which was power washed about 4 years ago and allowed to weather since then.


I wanted a Guest Room, so I decided to add the bed, two nice tall tables and metal bed to the room I use least in my house...my office.  I have a laptop now and don't spend nearly as much time on the computer in my office as I once did, so this was perfect.  As you can see I have a pretty checked tan/light brown and off white plaid curtain valance, with my pleated privacy shades underneath on the windows.  I decided to decorate with horses, boots and some other items.


The clock was a gift from my son, Stephen many years ago...and it fit right in with the design of this room.  Again, another tall table, sunflowers in a Ball jar and a lamp...to welcome a guest or 2 or even to light the way for me, when I want to sleep in there.


This is the other side of the bed...with more boots and a metal and wood piece of art adorning that wall.


All of the lamps, tables and artwork, including the HOME base with greenery and the Sunflowers in the Ball jar all came from Kirkland's...my favorite shop.  The Valances were from Menards.  The beautiful Comforter and Pillow Shams were from Target and the Metal Bed came from Art Van Furniture.


In the photo above, you get the best look at the Film pattern on the window.  It's beautiful.


Here's my corner desk.  There's not much there and the cupboards are mostly bare, for visitors to use for their things.  I purchased a much smaller desk chair, one with arms that were able to tuck under the desk top and out of the way.  The tile on the backsplash of the desk is new too.  I've always wanted tile there...or wallpaper, and when I had the tile man here, and I had extra tile, he did this.  I love it.

As I stated at the beginning of this post...my tastes have changed and I've gone for a more relaxed decorating look.  Wait til you see the next room I'll be sharing with you.  You'll get a look at another room, decorated alot differently than it was originally.  That post will appear next week.  Every room in my house has been redone, from painting, to flooring and curtains, comforters and artwork and lamps.  So keep watching.  Thanks for stopping in today.


Saturday, January 24, 2015

Change

Come on in and sit down with me, I have a Blog Story to share with you - while it involves Change, it has a beautiful Fairy Blog Mother involved, too! 

Have you noticed the changes I've been making throughout the month of January, here on my Blog? I created my Banner and everything you see...all the little "pretties" and all!  And now, I'm finally finished.  I'm not one...
for "settling" until everything feels right and comfy to me.  Do you do that too?  It's kind of like fluffling the pillows on the sofa!!

Besides the big name change that came on New Years Eve...from The Comfort of a Safe Place to Jan's Place...I've done alot of editing and rearranging.  So, I thought I would share some things with you today.

I hope you all know Linda from Life and Linda - if you don't, stop by and visit her.  She is full of great Blog information, beautiful Tablescapes and Decorating Ideas too...plus alot more.


The home of the Bestest Fairy Blog Mother of them all - LINDA! 

I haven't had Linda re-do my Blog...or even make me a Banner...but I love her work and think very highly of all that she does...I just LOVE doing my own.  But Linda helped me with a huge problem.  I got my blog all set up - new Banner and everything in place, but I couldn't get the Date or Comments or labels onto my individual posts and I really worked at correcting it...then finally shouted out to Linda.  The Fairy Blog Mother came to my rescue.  Thanks Linda!  In no time she had it all working again.

She does wonderful work.  She also designs blogs!  Some of the most popular Blogs that I visit, have Blog "outfits", designed by her.  Stop by and check it out.

While she worked on my Blog problem, she left me with an extra little something - {originally called "Sitemap"}, which I have renamed ARCHIVES.

My Navigation Bar, that you will see under my Banner at the top of my Blog isn't fancy, but it's a wealth of information!

From left to right...is the...

Home Button - will take you back to the main page of my Blog
About Me - which you can read and learn a bit more about me
 Archives Button - shows you a list of all Posts, by Category of the label I use on them.  It makes it so easy to find something you're looking for on my blog
Contact Me - there is a form for you to fill in, with all the information needed to send a private message to me
Open House Tours - all of my posts of Homes For Sale and their Tours
Recipes Button - takes you to My ReciPage - which is full of my (and a few friends' recipes), complete with a photo and directions and the capability of printing each recipe for yourself.
Tutorials Button - there are some beautiful tutorials listed there, with the link to the blogger who made them

Go ahead and click on them and find out for yourself how much information is there!


And then of course, a Link/Photo to my Fairy Blog Mothers' Blog.  
Stop by and visit Linda!

I hope this little tour around my Blog will help you find things easier and make your visit even more enjoyable. 

Friday, January 3, 2014

Black Armoire

My Display Window

I love how my Display Window has taken shape.  It's in my Office, in the top part of the Armoire {doors have been removed} and when the Glass French Doors to the office are open almost all the way, it looks exactly like this from just outside the office...from my Living Room/Great Room.  It's not a large
area - maybe 34" wide and 36" high...maybe.  In the back of the opening, I tacked up a piece of Minky Fleece in a pink leopard print and layered it with a pretty oval lace doily {just pinned onto the leopard fabric}.  On the bottom, I have vintage crocheted doilies...Perfect!  It gets changed quite frequently.  It's easy enough to do...it hardly takes any time at all...and just dresses up that corner of the office.


On the right side, I've added another doily and a pretty hanging pillow.


Inside, I've included Pretty Boxes, a Clock and some of my Handmade Jewelry...and a lamp for soft lighting.


On the left side, I've hung a metal Painted Plaque and surrounded it with more of my Jewelry. 


For softness, I've added a Bunny Rabbit, with her baby.  I just love her hat and Rose.


Another Rabbit in the other corner, accompanied by a precious little Teddy Bear.


A close-up of the pretty Hanging Pillow.


This Armoire has always been black and originally it was purchased with a Black Bed and Nightstand for the Guest Room.  When we decided to make the Guest Room into a Den, it was used as extra storage and then finally, after I got rid of the TV stand, itwas used to hold the TV.  It had doors on it, too...along with four drawers {only two are visible} at the bottom.  After using it for the TV with the doors on it {which neither were pocket doors nor folded all the way back to open} I decided to remove the doors completely.

In November, I moved the Armoire into a niche in my office, behind the door.  Then, I decorated it...and I love how it turned out.  It adds some light and in that corner of the room - next to a closet and behind the french doors.


On top, there is a Hat Box, with none other than more Leopard Print and Roses.


Hope you've enjoyed seeing what I've done with My Armoire.  What have you done with pieces of furniture in your home to turn them into a display area...with storage?

Friday, February 1, 2013

A Bit of Everything!

Willis Graves Bed Breakfast Inn
Being at the Burlington's was so peaceful and restful.  I took a wonderful whirlpool bath, then a steam shower, followed by a massage.  It nearly put me to sleep.  Follow along below and join the Tea Party - there are some delicious Desserts.  You can also read about the Willis Graves B&B HERE...


Taking my TeaCup, Saucer and TeaPot with us is something I almost always do, because it just makes the time more special.  And sharing it with everyone in my Tea Party Post, really was alot of fun.


Our Luncheon was so delicious!


And I loved showing you how I blinged these pretty shades all up to go on a NEW BRONZE Chandelier!  You can see more of that post HERE.

Monday, January 21, 2013

Chandelier

This is a Before & After Post of My Dining Room Chandelier.  Our very first chandelier, it came with the house when we had it built...and supposedly was an UPGRADE.   It was round metal - Bronze - curved and had some small chain hanging from the top to each arm.  That's it.  Here's a picture of it hanging in our Master Bathroom with shades I added.  It even seemed too...
small for the space there...let alone over a Dining Room table!
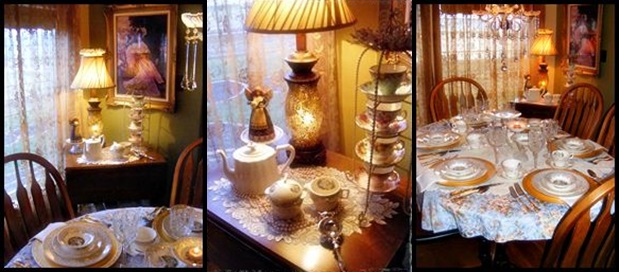
To give you some perspective here...the window on the left measures 36" wide.  The Chandelier after that one, was one I picked up for $9.00 on Clearance at Lowe's.  I spray painted it Bronze, from a yellow/gold color and it worked.........for a while.  (It was what I could afford at the time, shortly after moving in.)

Then...are you ready?

Another Chandelier.  Full of Crystals and Bling.  


 It just seemed to fade into the background at times...and then hid "pretties" in the background too.


I eventually took the biggest ball of bling at the bottom off.  I didn't like it.  It helped...but NO, NOT enough!

It again...worked for a while.  It just didn't feel right!


So...eventually, even that chandelier went away.

What came next, you ask?

Well, some of you may have noticed something NEW on my Blog Banner...that's why I'm posting about it today, Monday - instead of having my HOME TOUR.  Tomorrow I will be posting my Home Tour.  You won't want to miss it...it's a Mansion!  And it's in Wisconsin!

OK...here's the NEW Chandelier...

5 Lights
Bronze
Alot Bigger
Fits better over the Dining Room Table
And it doesn't obstruct the view as much

This is the photo from the Website where I purchased it - LAMPSUSA.com


Here it is...hanging in my Dining Room
I really LOVE, LOVE, LOVE it...the size is right...the color is right
and
I have an idea that will take it over the top...making it beautiful!!

I bought 5 Animal Print Chandelier Shades, covered in Satin...very reasonably priced on eBAY!


I added those to the chandelier...hmmmmmmmmmmm....

Great idea in the making!

This is what the shades look like lit up!  Pretty...and did I mention I LOVE Animal (Leopard) Print?  Yes, I do!!


I had a thought...
I knew I had some of these "pretties"
in my stash...not enough?  Oh no...
I was still able to order more!!

They arrived so quickly too!


Then some pretty Waverly Trim!!

This one is the same on both sides of the trim...


The Waverly trim above is Scalloped on one side.

I started hot gluing the trim without the scallop to the inside of the shade...making sure it slightly overlapped the white edge of the shade.  I didn't want to be sitting at the table and being able to see that white "edge" of the shade when looking up at the Chandelier.


Then...on the outside, I hot glued the Scalloped trim, the same way...making sure that the spaces in between the scallops covered the shade edge, thus allowing the scallops to hang below the edge of the shade.
After I glued on the "pretties", again with Hot Glue...the pearl trim hung in between the Scallops on the trim.

This is the Pretty  Addition - a 3-Roses with Leaves and a Pearl Dangle Applique..just hot glued on to the top of the scalloped Trim - in between each scallop, so the pearl hangs in between the scallops.


Here's the Finished Shade - see all of the pretty texture in between the Appliques?


Are you Ready?

Here is the Chandelier with all the pretty shades on it.  I had to take the photos without any sun...cloudy days persist.  But...the Dining Room windows face north...so it tends to be a bit darker in there most days.  I left the lights off in these photos because with them on the trim is not so noticeable.  And since I went to all the trouble enhancing these shades, I wanted you to see them!  This certainly cheers up the Dining Room...along with other things I've been busy doing since you saw the Dining Room last (saving that for another post - later - when the project is complete)!


This is the Clip to attach the shade to the bulb...so make sure you select the right kind of bulb so these shades sit properly and don't tip over. Use a torpedo shaped bulb, like the one in the next photo - very rounded...NICE!


Here is the Chandelier with the lights turned on...and these are only 40watt bulbs...ENHANCE bulbs.


I certainly think I found
MY CHANDELIER!!

I'm very pleased with how these shades turned out and how the entire chandelier looks in the room.  I just took my time doing the shades...and in less than 5 hours (with a couple of interruptions in between), I had all 5 of them finished.  I didn't cut the trims until I was ready to hot glue the last bit of the trim, to prevent unraveling.  Then I just glued the edges down...and pressed them together.  (No overlap at all) 

For the Roses, I put down a line of hot glue ON THE BACK OF THE ROSES (from side to side, not quite to the edges, to prevent the glue from oozing out) and making sure I quickly had them exactly where I wanted them, pressed the roses onto the shade.

These hardback shades, covered with satin measured 6"x5"x3".

So, what do you think?  Any great ideas coming to your mind after viewing this?

Have fun creating!!